How to use Mullvad VPN in Russia - Darkn.Space
How to use Mullvad VPN in Russia
It appears that Roskomnadzor managed to do its job properly, and not only
blocked Mullvad’s website but also made accessing their API impossible without
a VPN or proxy. As far as I know, the official Mullvad app relies on that API
for login functionality and for fetching the list of servers. Unfortunately,
the built-in bridges don’t help with bypassing RKN’s ban, as they work only
after you log in. Please keep in mind that this article might not be fully
up-to-date and RKN can try to disrupt this method as well.
This article is based on this mullvad help
page.
Android
Configuring shadowsocks on android is the easiest one so far. Unfortunally,
we’ll have to use OpenVPN instead of the official Mullvad app.
Requirements
Let’s start with the list of software that we’ll need:
Configure the Shadowsocks app
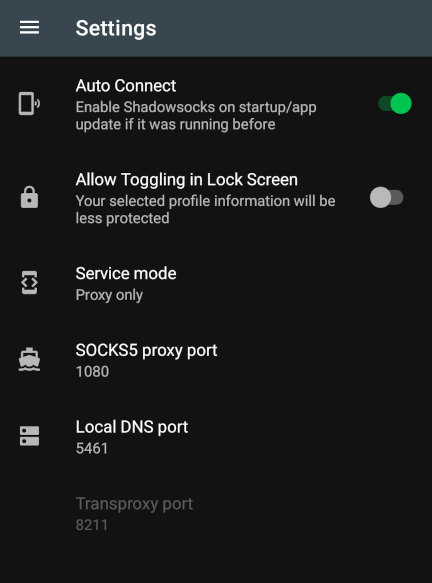
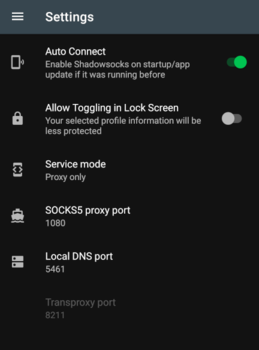
- Tap on the ☰ menu icon in the top left corner, then Settings.
- Tap on Advanced and then tap on Service mode and select Proxy
only.
Make sure that the SOCKS5 proxy port is set to 1080.
- Tap on your device’s back button.
- Tap on the plus icon on the tool bar on the top and select Manual
Settings.
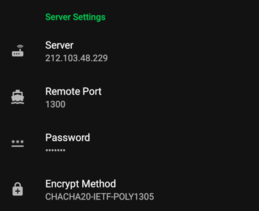
- Tap on Server, enter 212.103.48.229 and tap on OK.
- Tap on Remote Port, change the number to 1300 and tap on OK.
- Tap on Password, change it to mullvad and tap on OK.
Tap on Encrypt Method, select chacha20-ietf-poly1305 and tap on
OK.
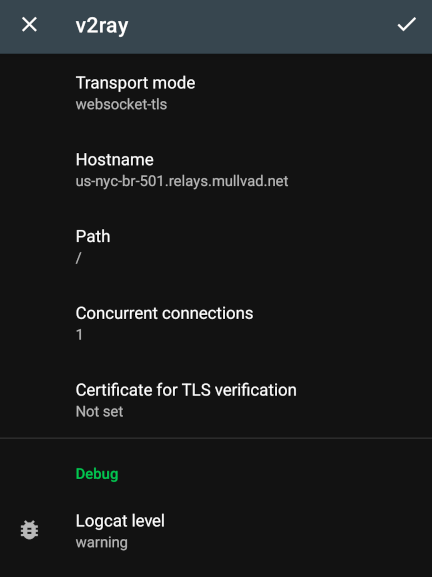
Scroll down and select Plugin: v2ray.
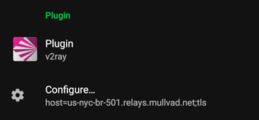
- Tap on Configure…
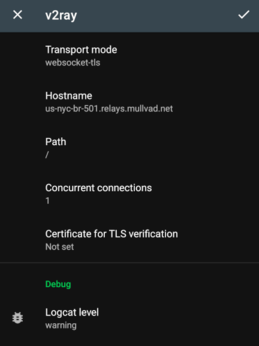
- Tap on Transport mode, select websocket-tls.
Tap on Hostname, enter us-nyc-br-501.relays.mullvad.net and tap on
OK.
Configure the OpenVPN app
- Download an OpenVPN configuration
file for Android and
make sure that Connect via bridges is checked.
- Open the OpenVPN for Android app.
- Tap on the + icon and tap on import and then choose the OpenVPN
configuration file that you downloaded before.
- Tap on the pen edit icon next to the profile you imported.
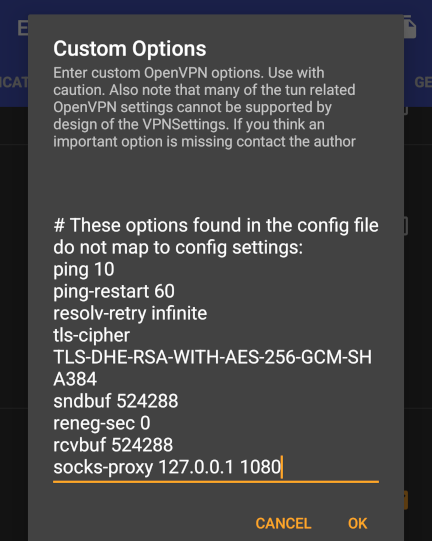
- In the top bar, scrool to the left and tap on Advanced. Then scroll down
and tap on Custom Options.
On a new line add: socks-proxy 127.0.0.1 1080

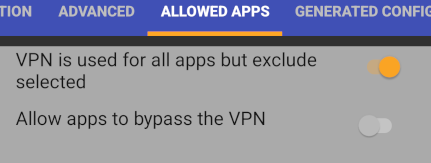
- Tap on OK. Then in the top bar tap on Allowed apps.
Make sure that VPN is used for all apps but exclude selected is enabled.

Scroll down the list and find Shadowsocks and tap on the square icon to
enable it.

- Tap on your device’s back button.
Connect your phone
- In the Shadowsocks app, tap on your profile and then tap on the connect icon
in the bottom (looks like a paper airplane).
- In the OpenVPN app, tap on the server profile to connect to it. The first
time you connect to a profile, you will be asked for a username and
password. Use the following: username – use your Mullvad account number
(without any spaces) password – use the letter m
- In the log window it should say “Initialization Sequence Completed” in the
bottom.
- Tap on the arrow button in the top left corner.
- Both apps should now say “Connected”.
- Verify your connection with Mullvad’s connection check
page.
Linux
This one’s a bit tricky. For the official Mullvad app to work we’ll need to use
another VPN(or you can use VPN on your phone by utilizing tethering feature).
Using Mullvad VPN itself is not necessary for that. Any VPN that let’s you
connect to Mullvad’s API will be enough. I used Calyx VPN, as it’s not banned
by RKN.
Requirements
You can pretty much get Shadowsocks and v2ray plugin for it from your
distribution repositories. For example, in Debian you can install
shadowsocks-libev and shadowsocks-v2ray-plugin packages.
When it comes to acessing Mullvad website for downloading app and configuring
keys you can use another VPN or something like Censor
Tracker, just add mullvad.net to Proxying
List in settings.
Configure Mullvad
- Set Mullvad to use a specific bridge server and port:
mullvad bridge set
custom local 1080 62.133.44.202 1300
.
- Connect Shadowsocks outside the VPN:
mullvad-exclude ss-local -s
62.133.44.202 -p 1300 -l 1080 -k mullvad -m chacha20-ietf-poly1305 -b
127.0.0.1 --fast-open --no-delay --plugin ss-v2ray-plugin --plugin-opts
"mode=quic;host=us-lax-br-401.relays.mullvad.net"
.
- Make sure the above command is always running when you want to use VPN.
I personally added it to KDE’s Autostart Login scripts, because I use VPN
all the time.
- Set Mullvad to use OpenVPN protocol:
mullvad relay set tunnel-protocol
openvpn
.
- Set Mullvad to use Bridge mode:
mullvad bridge set state on.
- Now you have to use another VPN, because Mullvad app needs to reach its
API, and it’s unable to do so without your help. I just turned on Calyx
VPN on my phone (or
if you have already set up Mullvad on your telephone you can use that as well)
and enabled tethering. Keep in mind that you should enable “Allow clients to
use VPNs” and disable any other connections on your pc besides your phone.
- Log into your account in Mullvad app or use:
mullvad account login.
- You can connect now! Use GUI or:
mullvad connect.
You can use any server now, to do that just choose your exit point via GUI.
Windows
Windows part of this guide is pretty much the same as the Linux one, the only
difference is that now you have a nice GUI to configure Shadowsocks.
Requirements
Download and install:
Also, download:
Configure Shadowsocks
- Unzip the Shadowsocks zip file that you downloaded from GitHub.
- Right click on the v2ray plugin archive you downloaded and extract it with
7-Zip. You’ll get another archive which ends in .tar file extension and you
have to extract it with 7-Zip as well.
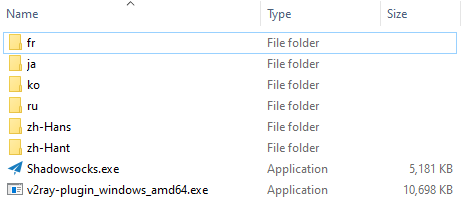
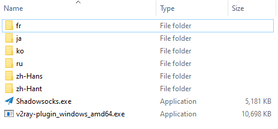
Move the extracted file (it will have .exe file extension) to the
Shadowsocks folder. Now it should like somewhat like this:
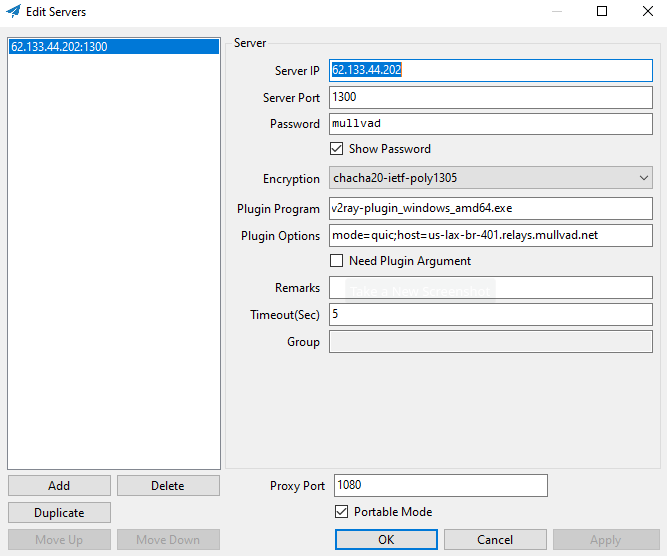
Start the Shadowsocks app. Fill in the fields according to the settings
below: Server IP: 62.133.44.202 Server Port: 1300 Password:
mullvad Encryption: chacha20-ietf-poly1305 Plugin Program:
v2ray-plugin_windows_amd64.exe Plugin Options:
mode=quic;host=us-lax-br-401.relays.mullvad.net Proxy Port: 1080

- Now just click Apply and OK.
Configure Mullvad via Command Prompt
Open the Command Prompt and run the following commands:
 mullvad bridge set custom local 1080 62.133.44.202 1300
 mullvad relay set tunnel-protocol openvpn
 mullvad bridge set state on
- Now you have to use another VPN, because Mullvad app needs to reach its
API, and it’s unable to do so without your help. I just turned on Calyx
VPN on my phone(or
if you have already set up Mullvad on your phone you can use that as well)
and enabled tethering. Keep in mind that you should enable “Allow clients
to use VPNs” and disable any other connections on your pc besides your
phone.
- After you connect your PC to some kind of VPN you have to log into the
Mullvad app. You can do that using app itself or using commands prompt once
again:
mullvad account login.
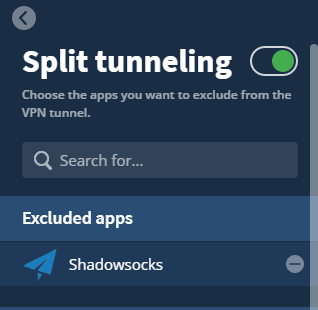
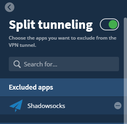
Now go to the Mullvad app settings > Split tunneling and click on the button
“Find another app” in the bottom. Browse to the location of the Shadowsocks
app (“Downloads” folder) and select Shadowsocks.exe and click on Add.
- After you sucessfully log in, you can connect by clicking the Connect
button. You can also use command prompt for that:
mullvad connect.
© 2023
Darkn.Space —
CC-BY 4.0 License